Making the Service Installable
Currently
the service is not in an installable state. We have to add the proper
components to allow the .NET Framework to install the service and make
it compatible with the Win32 subsystem. In the Solution Explorer,
right-click Tutorials.vb and select View Designer.

In the Toolbox, expand the Components section and then drag a ServiceController onto the Tutorials.vb design surface.
Note
If you do not see the Toolbox, click Toolbox on the View menu. |
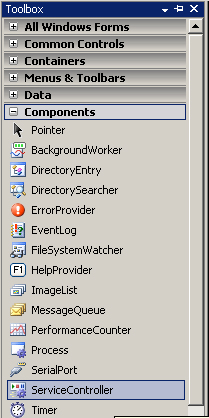
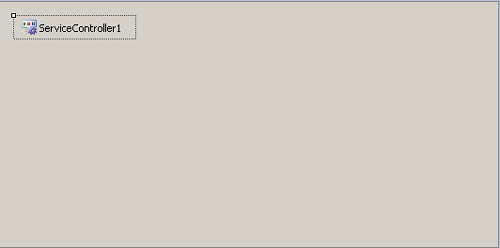
After you add the control, you will see it on the designer surface as ServiceController1.
Setting the Service Properties
Right-click ServiceController1 and select Properties. In the properties window, click Service Name and type Tutorials. This name will be listed on the Administrative Tools, Services page. Save the project.
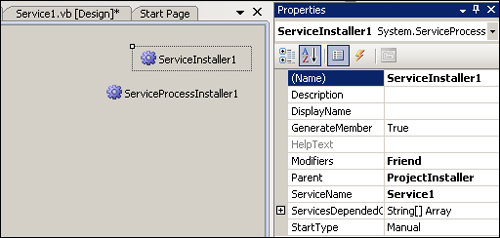
Double-click
Tutorials.vb to open the Design window. Right-click anywhere in the
gray window and select Add Installer. You should now see the
ServiceInstaller1 control.

Right-click ServiceInstaller1 and select Properties. In the Properties window, type Tutorials for the Service Name.
Note
The service name is used when issuing net start and net stop commands from the Command Prompt command line. |
You
will see the Description property listed in the Description column of
the Control Panel\Services administrator console. You will see the
DisplayName property in the Name column of the Control Panel\Services
administrator console. You will not see the short name or the service
name.
Setting the Startup Options
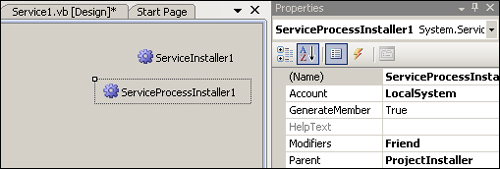
Right-click the ServiceProcessInstaller1 object and select Properties. For the Account property select LocalSystem.
Additional Configuration Options
To better secure the service, we will set some of the optional security settings available to us in Visual Studio.
Adding a Signature Key File
It
is important to protect your application as well as make it safe for
others to use. Select Tutorial Properties from the project menu, and
then click the Signing tab. Click Sign The Assembly. Select the
drop-down box and choose New. Type in Tutorials as the key file.snk name and type in Tutorials for the password.
Adding Security-Specific Settings
After
you set up the signature file, click the Security tab. Enable the
default security settings by selecting the Enabled ClickOnce Security
Settings check box. Save your settings and close the Properties window.
Building, Installing, and Deploying
Now
that we have written the code and created installer components that
will allow us to use the .NET Framework to install the service, we need
to save and build the project.
Select the Save All option. Visual Studio displays the Save Project dialog box. In the Name text box, type Tutorials. Click Save.
You
have multiple ways to build the project. You can right-click the
project and choose Build. Or you can choose Build from the menu and
click Build Solution. You will be able to determine whether your
project’s build was successful by looking at the status bar in the
bottom left corner of the IDE. If the build failed, review the error
list and correct the errors in the build.
After you build the project successfully, it is time to deploy it.
Creating Your Service Storage Location
Open
Windows Explorer, and navigate to the Tutorials\Bin\Release directory.
Copy the pdb and exe files to c:\temp. If this path does not exist, you
can create it, or you can use whatever path you prefer. However,
c:\temp is the path I will use in this example. After you copy the
files, open the Visual Studio 2008 Command Window by selecting Start,
selecting Run, typing cmd at the prompt, and clicking Enter. Type cd c:\temp to switch to the c:\temp directory. Type installutil tutorials.exe
to install the service. If this does not work, read the next section to
ensure that you have the proper configuration for the installation
utilities.
Verifying That You Have .NET 2.0 Installed
At the command prompt you opened in the previous section, type installutil Tutorials.exe.
This will run the .NET installutil utility, which will register your
service. If you happen to have any other version of the framework
installed, the incorrect installutil might be in the current path
environment variables. Therefore, when you attempt to register the new
service you get an error. You can easily figure out which version of
the Framework is installed by typing installutil
at the command prompt, and reading the version from the top of the
output in the Command Prompt window. At the very top of the output you
will see which version of installutil was executed.
If
the incorrect version is in the path, your installation will fail. To
remedy this, you can either run installutil from the Framework\2.0V
directory or you can add the proper path for the 2.0V Framework into
your environment variables. After you do this you will need to close
the command prompt. When you reopen a new Command Prompt window, you
will utilize the proper installutil.
Note
In Windows Vista, you will need administrative privileges to install the service using the installutil.exe framework utility. |
If
you do not have the Framework 2.0 installed at all, you can download
the different framework versions from the Microsoft Update Web site.
Verifying That Your Service Is Installed
After
your service is installed, you can go to the Administrative Tools
|Services screen and see the service Tutorials Display Name, with a
description of Tutorials. In Windows Vista and Windows XP, click Start,
click Control Panel, click Administrative Tools, and then click
Services. In Windows Server 2003, click Start, click All Programs,
click Administrative Tools, and then click Services.
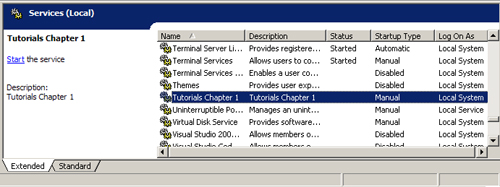
Right-click the service and select Properties.
<OnStart> Message
Click
Start, click Control Panel, click Administrative Tools, and then click
Event Viewer.I In the Application log, you should see the EventID 1000
with a Source of Tutorials. Double-click the event and you will see
Tutorials Starting. This, of course, is the information we typed in the
<OnStart> code.
Now let’s test the rest of the events.
<OnPause> Message
On
the Services Control Panel, right-click the service and select Pause.
In the Application log, you should see your EventID 1002 event with the
<OnPause>
message. The actual code does not pause the service.
<OnContinue> Message
After you have validated the <OnPause>
event, right-click the service again and choose Resume. You will notice
that the only options you have are Stop, Resume, and Restart. At this
point you should see your EventID 1003 event with the <OnContinue> message in the Application log.
<OnStop> Message
Click the service and select Stop. The Service Control Manager will call your <OnStop> method. In the event viewer you will see the EventID 1001, which is the Tutorials Stopping event.
This
concludes the creation of the first service. Although it is a simple
service, it gives you a basic idea of how to create and release a
service developed in Visual Basic 2008.